Pages

Showing posts with label jacket. Show all posts

Thursday, April 27, 2017

What doesn't kill you may make you stronger, but it definitely tires you out

(Friends, I started writing this post in November, now it is almost May and I had completely forgotten about it.  For the sake of posterity, I will post it in its unfinished form--clearly my title was spot on!)

The PR Sewing Bee is over.  I was not the winner, and I was pretty down about it.  I knew after the 4th round entries were posted, I had some real competition, but I also felt that I was one of the top contenders.  Sigh.  Needless to say after 6 weeks of mad sewing (and in the case of Round #3, angry sewing) I was completely wiped out.   

Now that my Bee recovery is over and Halloween costumes are done, I can revisit my Round #4 entries.

The challenge was to make a Day to Night Outfit.  I made a lined jacket, a lined sheath dress, and a sequined bolero.

I used Butterick 5147 Lifestyle Wardrobe pattern for the jacket and dress.

Sunday, May 15, 2016

Endless Combinations!!

Hello! I have been sewing like mad!  When I discovered that Hancock Fabrics was going out of business, I went a little nuts buying fabric.  By "a little nuts", I mean a little more than a little.  ;)

I started sewing up my new-found stash and then discovered the Endless Combinations Contest going on at Pattern Review.  It was fate I tell you!!

Let me describe my entries in the following ways:
1.  Using cool fabric
2.  Replicating a cool pattern envelope photo
3.  Replicating a long gone and memories-attached jacket


First up. A skirt made from a blue/white/navy/green swirly ITY knit.  I used the trusty McCall's 6654:


Cool fabric isn't it??  Since the going out of business sale at Hancocks had 2 yard minimum cuts, I had plenty left over for a top to match.  Enter Vogue 8390:


My previous version of this pattern was in a brown knit and I still love it (but it did need some tweaks):

When the 2 pieces are worn together, it looks like a dress:


On a side note, I have started running...and apparently my waist has returned!!

Part 2 of my thoughts for this contest was replicating the Jalie Eleonore pattern cover.  In particular, the light blue capris and the striped top:

Jalie Eleonore Jeans

The model seemed so springy, cool and comfortable.  It is very unlike me to copy a pattern photo, but it happened this time.  I even bought similar shoes!!  

My attempt at the cover pose

I did a split hem on these, using this excellent tutorial from pattern~scissors~cloth.

The top was a new pattern: New Look 6384.   Let me tell you that the top runs big.  I cut a large and should have done a medium.  The neckline was both low and wide.  I took in the shoulder seams and also the center front.  The fabric was a white striped interlock knit which I used on this dress:
McCall's 6886 blogged here

I am not a big fan of interlock knit mostly because it has poor recovery.  My neckline was a wavy mess when I finished it:

I was industrious and used some stretch thread which I ran through the channeling made by the neck binding.  I did not follow the pattern instructions, but used Jalie's method of using a skinny binding. Here is a great tutorial to show how it's done.  Once the elastic thread was inside the casing, it was almost gathered.  After ironing, however, it came out perfect!  Quite the save!!


So my pattern envelope re-enactment was finished and last up was replicating a long gone and memories-attached jacket.  Back when I was 18, I was an exchange student in France (Western Brittany).  At some point during my year long stay, I purchased a white Gap jean jacket from the Kilo Shop, where everything is sold by the kilo.  I remember the jacket being a bit too big, and I remember adding velcro to the inner pockets to prevent pick-pocketing during my travels (I was really paranoid about theives).  I have fond memories of that jacket including learning that the French word for velcro was "velcro".  So when I needed something to create Endless Combinations, a white jean jacket would be perfect.

I used Butterick 5616 from my stash:
Butterick 5616

Most reviewers mentioned the pattern being boxy, which is something I meant to minimize, if not eliminate.  I wisely made a muslin and did the following changes:

1.       I tapered the center back piece to narrow at the waist.  As drafted there was about a 2” difference between the finished bust and finished waist measurement…boxy indeed!
2.       I did a swayback adjustment, taking a ~1” fisheye dart across the back & side back pieces, tapering to nothing at the side seam.
3.       I did a slight FBA adding 3/8” to the bust at the side front.
4.       Below the bust I shaved off ~ ¼ ”on the seam to fit closer to the stomach.
5.       From my muslin, I discovered that the shoulders were very wide.  I narrowed them about 5/8”.
6.       I lengthened the sleeves from ¾ length to full length.
7.       I made the sleeve cuff narrower to match the lower band and used 1 button instead of 3
8.       I added ¼” twill tape along the collar to stabilize it. 
9.       I added interior pockets to the front pieces (you must have interior pockets to thwart pickpockets!!)
10.   I added a coat hanging loop.

I had JUST enough fabric for this jacket.  This is all that was left:
"Big" Scraps

"little" scraps

I am very happy with how it turned out.  I did made a bit of a goof-up however.  The sleeves & cuffs were designed to be 3/4 length and ending at the forearm.  I made the sleeves full length, but I forgot to taper them both down to be wrist size.  I realized my error after the cuffs were attached and topstitched.  Sigh...   So I put the button on ~2" from the edge of the cuff to make them a more sensible size.  


My Endless Combinations were complete.  Here is my collage:


It is a great assortment of outfits, and I am very pleased with how they turned out.  

Mid-April I was able to tag along when my husband had to go to Miami for work.  Here is a photo of me on South Beach, all cool and windblown:


Tuesday, March 31, 2015

My my my Minoru!

I have been very inspired by Pattern Review's contests this spring.  This is the 3rd in a row that I have entered.  This is for the "Best Pattern Contest".  Looking through the best pattern options, I was pleased to see that I already owned several of them.  The only one that really stood out to me was the Sewaholic Minoru.  

I used a gray denim for the exterior and a blue daisy print slippery polyester for the lining, and interlined it with white flannel.  I made a size 12 and did a 1" FBA adding a front dart.  Here is a photo overload:


The obvious and well noted omission of this pattern is the lack of exterior pockets.  I added welt pockets on the exterior, and another welt pocket on the interior as well.  I only need an interior pocket on the left side, so I only did one. 


Using a welt pocket on the interior had one unexpected effect:  I was unable to bring the waist elastic around the front of the jacket very far.  The casing stitching would have gone right across the pocket bag of my welt pocket making it only a few inches deep!  Aaack!  So I simply decided to stop the elastic short of the pocket bag, so it only extends about 1" forward of the side seams.  


Scouring the internet, I found so many great Minoru variations.  After seeing this one from Kristy at Rocket Sews, I decided to add a zipper guard just like hers.  Imitation is the best form of flattery after all.

This is how I did the zipper guard based on Kristy's method:


I love how the zipper shield turned out.  Initially, I wasn't a fan of the exposed zipper on this jacket, but it has really grown on me, and I'm happy I decided not to make additional plackets to cover the zipper.

Thankfully I finished this jacket while it's still cool enough to wear it.  :)


Tuesday, February 4, 2014

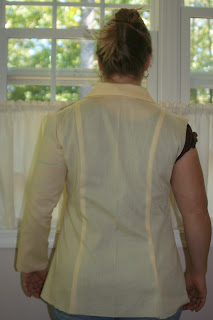
New Jacket: Butterick 5958, Muslin #1

I've decided on a jacket pattern.  It's going to be Butterick 5958. 
 
 
I've started on a muslin and my first impression of this jacket is that there are a lot of pattern pieces for something that looks so simple. 
 
I started by cutting a 16 an adding a 1/2" FBA, and grading up to a 20 at the hip.  I narrowed the shoulders by 1/2" each which is a typical adjustment for me.  

 
It's too big.  The front panels are too wide and I really didn't need to grade up so much at the hip. 
 
The bust point is too low; I'm going to raise it up about 3/4":
 
Edited to add: Thanks to a few good suggestions and advice, I will also widen the side fronts so that the princess seams fall in the right spot.
 
The back isn't too bad, it's just a little wide especially across the shoulders.  Once I get the front figured out, I'll look more closely at the back. 
 
You may be wondering which fabric I'm going to use, the purple boucle wool blend or the light gray wool blend.  Neither fabric has arrived yet (my Denver Fabrics order hasn't even been shipped...Arrg!), so I haven't made a decision.   Honestly, it might be neither.  While at Jo-Ann last week, I bought some dark blue non-wale corduroy which I may use instead.  Time will tell.  

Tuesday, October 29, 2013

My Garment for October: Another Simplicity 2057 Lined Jacket

Here is my entry for Pattern Review's Lined Jacket Contest and my Garment of the Month!  I made another version of Simplicity 2057.  This one is a short jacket (shorter than the pattern shows) and it's made from some brown suiting I bought in India.  I meant to do a burn test, but I never got around to it.  In any case I'm sure it's a blend, and it's completely washable!  For the lining I used a pink and brown hound's-tooth charmeuse satin I bought from Fabric.com. 

Front

Back View
I used the same adjusted pattern pieces that I used for my pink coat other than making the jacket fall at the high hip.  This made the front pockets very shallow which meant I needed to sew them up a little bit to make the opening smaller.   No biggie. 

 
I love the lining.  I bought it to use for a jacket lining and I am glad I did.  I forgot to add an interior welt pocket to the lining before I sewed the lining in, so I had to add a patch pocket after it was assembled. 

Look at that Pattern Matching!!


Before finishing this jacket, I needed to go out and buy buttons for it.  Don't you hate that...when you have piles of buttons in your stash and you don't have any that look good?  I went to Jo-Ann's and found some nice buttons for the ungodly price of $7.95 EACH (aack!).  They only had 3 in stock, and I needed 4.  I bought the 3 and kept the receipt in a nice and safe place.  I had also searched Jo-Ann's for some nice yarn to knit these boot cuffs and guess what?  Surprise!  I didn't find anything nice.  So I stopped in a new (to me) yarn shop in Charlottesville called Laughing Sheep Yarns.  Not only did I find some very nice yarn, but I found nice buttons too!!  They were way less than $7.95, so I was doubly happy.  :)

So there it is, my "Garment for the Month of October" and my entry for the PR Lined Jacket Contest

Friday, December 7, 2012

Kwik Sew 3290: Kids Fleece Jacket

This was my first Kwik Sew pattern and it really lived up to its name.  I opted not to use any contrast fleece for the side panels and to make a version without a hood.  For some reason our local schools don't allow kids to wear hoods.  Who knows why...probably some silly reason involving the work 'hoodlum'.  

Here is the finished jacket:


I made a size small (4-5) for my 6 year old.  The size was perfect.  The instructions were very easy to follow.  So easy, in fact, that I skipped step 14 which instructed me to slip the pocket under the front facing and tack them together with hand stitches.  My daughter wore the jacket for a few weeks and complained that she didn't like the "floppy pockets".  So I stitched them to the front facing and to the bottom hem, all the while thinking how smart I was and how silly the instructions were for not coming up with the idea themselves.  This is what I did:

Then, writing up my review on patternreview.com I realized that yes, I was the silly one.  Step 14 showed those instructions as plain as day.  Whoops.  Oh well.  That wasn't the first time I've done something silly and won't be the last.  

The only thing I should have done differently (besides reading all of the instructions) is to use a non-pill fleece.  After a few washes, I already notice pilling.  Oh well, next time. 

Monday, October 15, 2012

Purple Corduroy Jacket Finished! Simplicity 3628

The purple jacket is DONE!  I now present my version of Simplicity 3628 Project Runway design....Ta Da!

This was my first attempt at a lined jacket.  I got completely lost trying to read the pattern instructions for the lining.  I think they assumed I already knew how to do it.  Thankfully there are some pretty good tutorials like  this one or this one which helped me out.  One thing the pattern instructions told me to do that I missed was cutting the lining pieces 1" shorter than the fabric pieces.  I figured that out on my own, but it would have been easier to do that in the first place.  I wanted the jacket to stop at my high hip so I needed to shorten everything anyway.

Since I know you're dying to see more photos, here they are:

Here is a view of my purple lining and the corduroy interior pocket I added.  It should be noted that there are no pockets in this jacket (so silly), so I added one for my phone.  I located it under the bust so I wouldn't have any phone bulges where there should only be curves ;)
Side view
Back view
I'm hoping that the back wrinkles are only due to the fact that I have worn this jacket quite a lot since I finished it, not because it's really too tight anywhere.  It doesn't feel tight on, so let's call them travel wrinkles.

I am thrilled with my results!  I have been wearing this every chance I get and I'm just keeping my fingers crossed that someone somewhere will compliment me on it and I will get the chance to say "Thanks, I made it!"

Here's the official pattern review:

Simplicity 3628 (Project Runway)

Pattern Description: Misses jacket with front and sleeve variations.  I made view B without the cuffs or (fake) pocket flaps.

Pattern Sizing: 8-16.  I made a 14 at the chest, grading up to an 18 at the hip, and a 16 for the sleeve (but had to make it bigger)

Did it look like the photo/drawing on the pattern envelope once you were done sewing with it? Yes it did

Were the instructions easy to follow? The assembly of the jacket was straightforward.  I had trouble following the instructions for the lining, since I had never made a lined jacket before.  I found this online tutorial to be very helpful.

What did you particularly like or dislike about the pattern? I didn't like that there are no real pockets!!

Fabric Used: fine wale corduroy

Pattern alterations or any design changes you made:  I cut a size 16 for the sleeve, but found it to be too tight when I made up a muslin, so I slashed and spread it about an inch.  I also shortened the entire jacket (I'm not very tall) to fall at the high hip.  I omitted the pocket flaps for the fake pockets and added an interior slip in pocket for my phone.  I also did not make the cuffs so I extended the length of the sleeve piece prior to cutting.

Would you sew it again? Would you recommend it to others?  I would definitely sew it again.  I am contemplating making a red one so yes, I would definitely recommend it.

Conclusion:  I'm thrilled with the results of my first lined jacket.  There's really nothing to be timid about and the results are great!


Monday, October 8, 2012

I will NOT do a walk of shame: Purple Corduroy Jacket: Simplictiy 3628 (Project Runway)

Next up is a corduroy jacket made from Simplicity 3628. I will make view B (the purple version) minus the cuffs and pocket flaps (which don't hide real pockets-tisk tisk).


I cut a 14 at the shoulders and chest, grading out to a 16/18 at the waist and hip.  I only needed to add a little bit to each of the pieces thanks to the princess seams.

Here are some my muslin photos:

Side view

Things to tweak:
1.  Make the bicep bigger.  There was no way I'd get a long sleeve top on under this.  
2.  Take in the front princess seam from the waist down to the hip.  The muslin was sticking out and should have fallen straight down.
3.  Widen the side front piece next to the armhole.  There was a little bit of pulling and adding fabric to the front should get rid of that. 

4.  Make the side back slightly narrower next to the arm hole. There are wrinkles from the underarm up toward the shoulder removing some fabric should hopefully get rid of that.
5.  Swayback adjustment: remove some fabric from the back piece at the waistline.  

With my muslin made and tweaked I was ready to find some fabric.  I had some blue corduroy in the stash but I didn't have quite enough (there is a little foreshadowing here).  So I went to Joann's yesterday found some fine wale purple corduroy and foolish me, wound up not buying quite enough.  Part of it was operator error.  I knew I needed to cut 4 front pieces for the fronts and the facings, but I cut 2 and then thought I'd do the remaining 2 'later'.  Unfortunately I forgot about them when I laid out and cut out my last few pieces...and didn't have enough fabric left for those front facing pieces.  Aaack!!  I envisioned myself sneaking back into Joann's today with my head slung low, doing the walk of shame: because I didn't buy enough fabric.   Funny thing is that when I initially bought the fabric, I thought the bolt looked narrow (it was-it was only 42" wide), so I had her cut an extra 1/4 yard.  Sigh.  Next time I will add at least 1/2 yard.  So...what's a girl to do to avoid that walk of shame (not to mention the extra cost).  That's right.  I'm going to piece together the front facings.  I figure that where the seam will be, it won't be on display: it will be disguised among the button holes.  Even so, I hope it won't drive me nuts.


My pieced front facing


Related Posts Plugin for WordPress, Blogger...