Pages

Showing posts with label McCall's. Show all posts

Sunday, May 15, 2016

Endless Combinations!!

Hello! I have been sewing like mad!  When I discovered that Hancock Fabrics was going out of business, I went a little nuts buying fabric.  By "a little nuts", I mean a little more than a little.  ;)

I started sewing up my new-found stash and then discovered the Endless Combinations Contest going on at Pattern Review.  It was fate I tell you!!

Let me describe my entries in the following ways:
1.  Using cool fabric
2.  Replicating a cool pattern envelope photo
3.  Replicating a long gone and memories-attached jacket


First up. A skirt made from a blue/white/navy/green swirly ITY knit.  I used the trusty McCall's 6654:


Cool fabric isn't it??  Since the going out of business sale at Hancocks had 2 yard minimum cuts, I had plenty left over for a top to match.  Enter Vogue 8390:


My previous version of this pattern was in a brown knit and I still love it (but it did need some tweaks):

When the 2 pieces are worn together, it looks like a dress:


On a side note, I have started running...and apparently my waist has returned!!

Part 2 of my thoughts for this contest was replicating the Jalie Eleonore pattern cover.  In particular, the light blue capris and the striped top:

Jalie Eleonore Jeans

The model seemed so springy, cool and comfortable.  It is very unlike me to copy a pattern photo, but it happened this time.  I even bought similar shoes!!  

My attempt at the cover pose

I did a split hem on these, using this excellent tutorial from pattern~scissors~cloth.

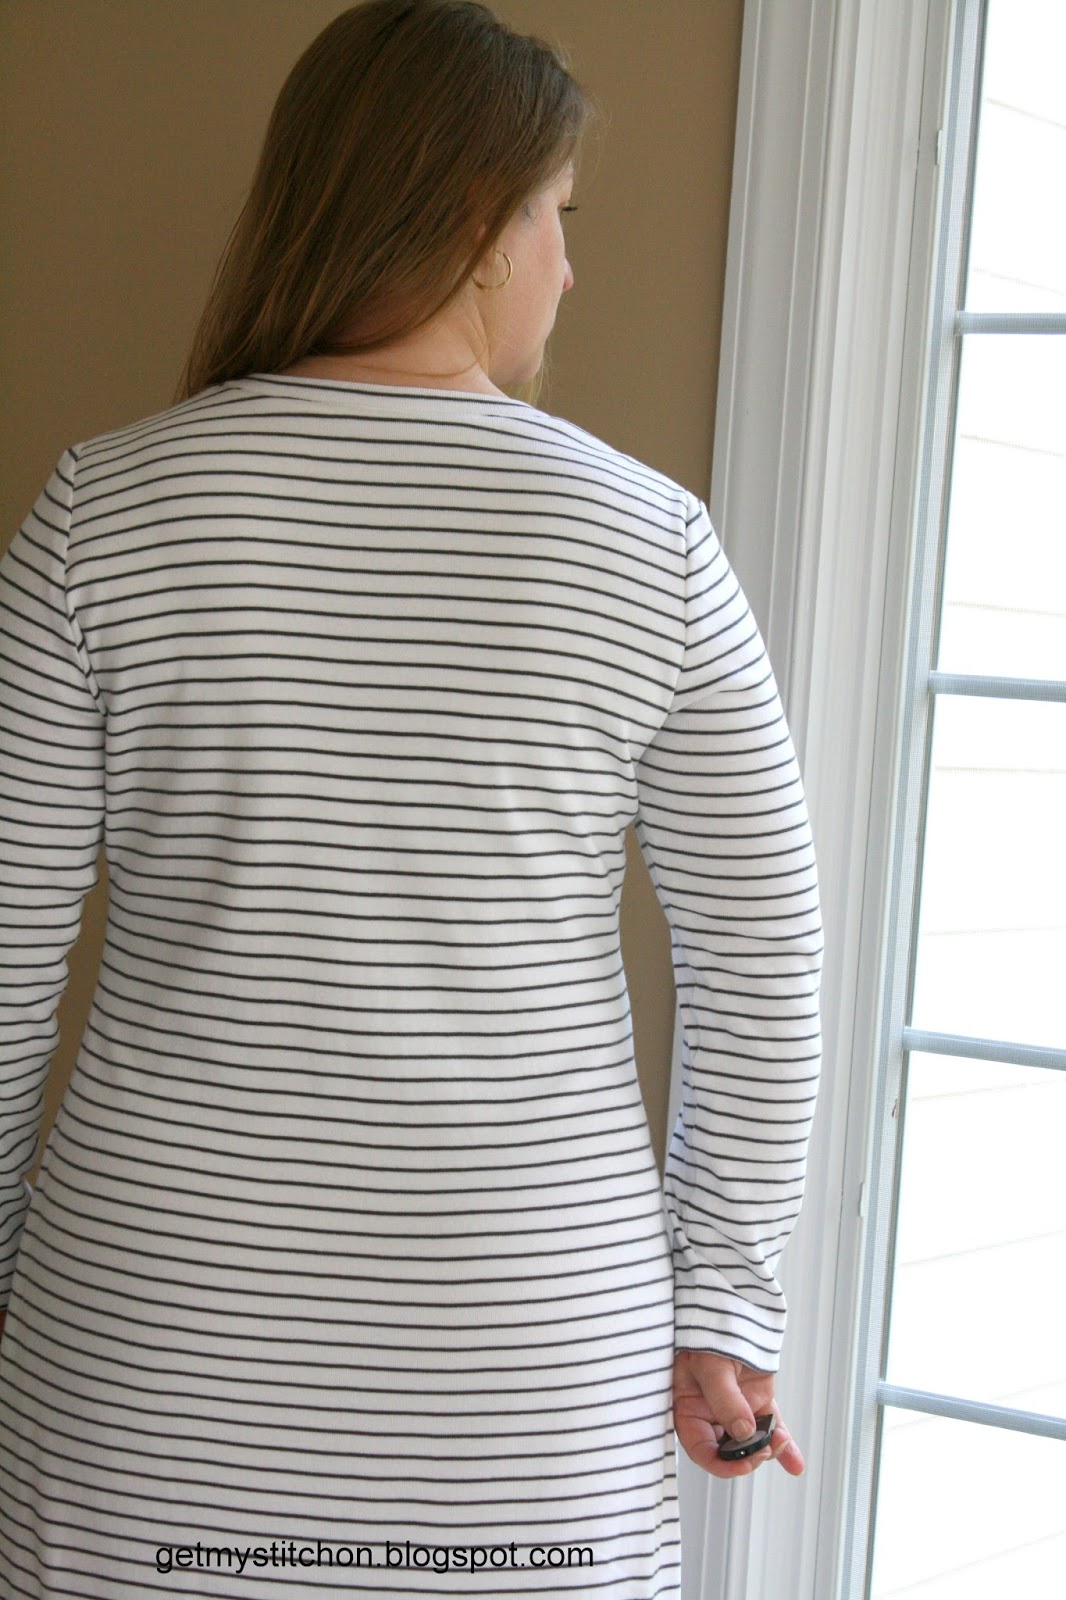
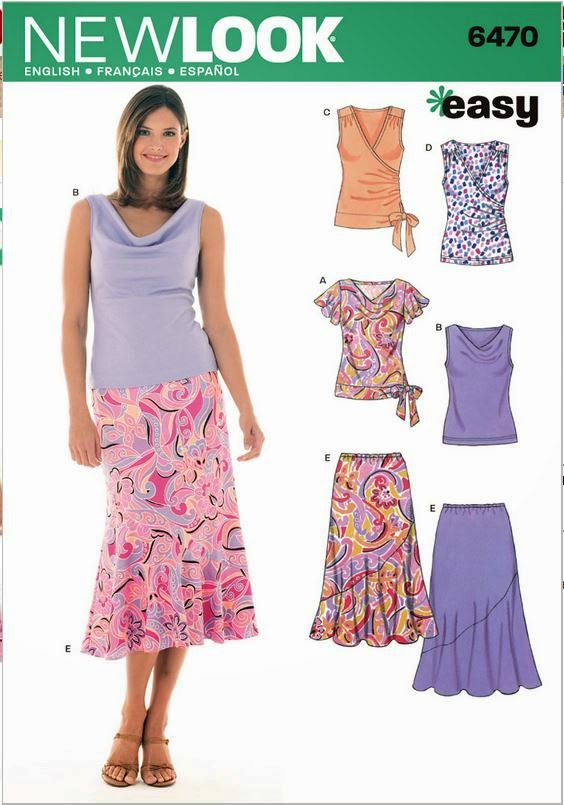
The top was a new pattern: New Look 6384.   Let me tell you that the top runs big.  I cut a large and should have done a medium.  The neckline was both low and wide.  I took in the shoulder seams and also the center front.  The fabric was a white striped interlock knit which I used on this dress:
McCall's 6886 blogged here

I am not a big fan of interlock knit mostly because it has poor recovery.  My neckline was a wavy mess when I finished it:

I was industrious and used some stretch thread which I ran through the channeling made by the neck binding.  I did not follow the pattern instructions, but used Jalie's method of using a skinny binding. Here is a great tutorial to show how it's done.  Once the elastic thread was inside the casing, it was almost gathered.  After ironing, however, it came out perfect!  Quite the save!!


So my pattern envelope re-enactment was finished and last up was replicating a long gone and memories-attached jacket.  Back when I was 18, I was an exchange student in France (Western Brittany).  At some point during my year long stay, I purchased a white Gap jean jacket from the Kilo Shop, where everything is sold by the kilo.  I remember the jacket being a bit too big, and I remember adding velcro to the inner pockets to prevent pick-pocketing during my travels (I was really paranoid about theives).  I have fond memories of that jacket including learning that the French word for velcro was "velcro".  So when I needed something to create Endless Combinations, a white jean jacket would be perfect.

I used Butterick 5616 from my stash:
Butterick 5616

Most reviewers mentioned the pattern being boxy, which is something I meant to minimize, if not eliminate.  I wisely made a muslin and did the following changes:

1.       I tapered the center back piece to narrow at the waist.  As drafted there was about a 2” difference between the finished bust and finished waist measurement…boxy indeed!
2.       I did a swayback adjustment, taking a ~1” fisheye dart across the back & side back pieces, tapering to nothing at the side seam.
3.       I did a slight FBA adding 3/8” to the bust at the side front.
4.       Below the bust I shaved off ~ ¼ ”on the seam to fit closer to the stomach.
5.       From my muslin, I discovered that the shoulders were very wide.  I narrowed them about 5/8”.
6.       I lengthened the sleeves from ¾ length to full length.
7.       I made the sleeve cuff narrower to match the lower band and used 1 button instead of 3
8.       I added ¼” twill tape along the collar to stabilize it. 
9.       I added interior pockets to the front pieces (you must have interior pockets to thwart pickpockets!!)
10.   I added a coat hanging loop.

I had JUST enough fabric for this jacket.  This is all that was left:
"Big" Scraps

"little" scraps

I am very happy with how it turned out.  I did made a bit of a goof-up however.  The sleeves & cuffs were designed to be 3/4 length and ending at the forearm.  I made the sleeves full length, but I forgot to taper them both down to be wrist size.  I realized my error after the cuffs were attached and topstitched.  Sigh...   So I put the button on ~2" from the edge of the cuff to make them a more sensible size.  


My Endless Combinations were complete.  Here is my collage:


It is a great assortment of outfits, and I am very pleased with how they turned out.  

Mid-April I was able to tag along when my husband had to go to Miami for work.  Here is a photo of me on South Beach, all cool and windblown:


Friday, November 20, 2015

McCall's 6886: 2 Versions of the popular knit dress

There are over 75 reviews on Pattern Review for McCall's 6886: a close fitting knit dress with neckline variations. I wasn't sure how this would work on me and my pear shape, but I thought I'd give it a try anyway.  My first version was done in black ponte.  I cut a 14 in the shoulders and did a 1.25"  FBA adding a bust dart.  I also did a 1" swayback adjustment. My result wasn't bad.  I had graded up to a 16/18 at the waist and a 20 at the hip.  It was very big.  I took about 3/4" off each side from the waist down to the hip.  (That was very surprising for me).  There was still a lot of pooling in my lower back, so I wound up making 2 back darts to take up the excess fabric.
Here is the front view:  I don't look like a giant pear!


Side view: not bad

Side view of bust dart.  Looks like I need a slightly larger FBA


Back view:  (I really need to work on standing up straight and not dropping my right shoulder).  You cans see the back darts I made to eliminate the excess fabric at the back.


The black dress came out pretty well, but I thought I should try again right away.  Version 2 was made with a very stretchy striped knit (it must be interlock or double knit because it is exactly the same on both sides) purchased at my local Hancock Fabrics in the clearance section.   For this version I made an even bigger swayback adjustment and skipped the bust dart and did a cheater FBA by grading out at the bust.  I lined the front and back with an ivory nylon tricot.  I love the feeling that the lining gives, it's very sleek and smooth on the skin.  It also adds stability to the stretchy knit.


My hem looks a little funny in these photos.  I hemmed the lining together with the knit.  The problem that I discovered is that the knit stretches vertically but the lining does not.  I may cut the lining loose and leave it unhemmed.

The back view is pretty good, no darts, and no real pooling. :)
  

I had trouble following the instructions included in the pattern but I found this great video from Jalie:


Closeup of the V neck.  


 There was one flaw in the fabric...look where it wound up: on my right side, a few stripes up from the bottom of the V.  Sigh.

In the interest of full disclosure, I had to do some finagling around the bust.  I had initially thought to do some slight gathers along the bust at the side seams, (like Vogue 8536) but it was ridiculous with this fabric, and I needed to remove the sleeves and re-do the underarm and lower front armhole area.  After some trimming and basting it turned out ok.

I wore it out with a red scarf and a denim jacket.  My daughter said all I needed was a beret to look really French!  :)

In summary, I really like this pattern.  It does work on pear shapes.  It was drafted roomier than I expected through the waist and hip and it was a nice ego boost to have to take it in in those areas!

Sunday, November 1, 2015

Halloween 2015: Part 2 Cleopatra

Next up in my 3 part Halloween set is Cleopatra, made from McCall's 7122.  (McCalls was having a sale when I was looking for patterns).  This is a woman's pattern which I made for my almost 11 year old (who will likely be taller than me in the next year to 18 months.)  I made an XS, and made 3/4 length sleeves.


Cleopatra's outfit is all about embellishment.  I used a sparkly turquoise & gold woven that I purchased in India to make the neck...dickey? gaiter? collar.  I fused some stiff interfacing to the wrong side, cut my circle based on my daughter's shoulder width, and neck circumference.  I did a rolled hem on my serger to finish the edges.  There are 2 snaps on the back to hold it into place.

Queens are all about gold too, so I used some gold lame one-way stretch knit for the belt, and arm bands.  They were all so simple, I'm not going to waste time explaining what I did to make them. Cut, stitch, adjust size, and sew on velcro.  Pretty easy to figure out.

The dress is a simple raglan sleeve dress with a neck band.  It is a "Learn to Sew for Fun" pattern geared for the beginner.  It was simple and quick to sew up and could easily be made into a raglan tee shirt.  I used a white cotton jersey fabric.


McCalls 7122

Line Drawings


Monday, March 2, 2015

Travel Wardrobe Tops

To create my travel wardrobe I had 2 colorful skirts and had several color options for tops.  I had a few purple knits in my stash and one of them happened to be exactly the right shade.  It's a lightweight drapey jersey, most likely a rayon blend (which is not my favorite).  Since I did not have a huge piece, I needed a pattern that wouldn't need much.  I decided on Jalie 2794: the Sweetheart top.

I cut a size X and made the neckline narrower as I did in my previous versions.  I made the cap sleeve version and added 3/4" to their length.  Here is the finished top:

Next up was New Look 6470, view D:


Many reviews commented about the neckline being very low so I made a muslin using some purple burnout jersey.  Lo and behold, the neckline was very low and I added a little modesty triangle to cover up more skin:

Much better:


For my real version, I used a black cotton lycra from Spandexworld.com.  I cut a 16 for the front and did a narrow upper back adjustment (ie I cut a size 12 between the shoulders) and graded up to a 18 at the hip.


The fit is snug and flattering.  I normally don't wear black near my face, but this top nips in my waist in such a fantastic way, this top will be worn quite a bit!

Next up is something I won't be wearing much:  Jalie 3245 Racerback Tank:

There's nothing wrong with the pattern, I just didn't like how it looked on me.  I altered the back to be less 'racerback' to hopefully cover my bra straps.  I didn't alter it enough, I'm sorry to say, and my straps are peeking out on both the front and the back.  What is glaring to me in these photos is that my arms look flabby and my shoulders look narrow.  Thumbs down.  :(


In the future, I will avoid the tank pattern and give the raglan sleeve version a try instead.  I am not including this top in my Travel Wardrobe 6 pack since I have no desire to wear it out in public.  It will find a new home in the pajama drawer.

The next tee is also not finding its way into my Travel Wardrobe simply because it doesn't coordinate with both skirts.  This is McCall's 5890 View C, the princess seamed tee.

My pattern started at size 16 so I needed to grade it down.  I made a quick muslin and was pleasantly surprised how nice it was.  I made the back quite a bit narrower, which is a normal adjustment for me, and added a CB seam to conserve fabric.  The fabric was a Leaf Green active-wear knit from Fabric Mart, leftover from my Jalie 2566 cardigan and the green just so happened to match the green in my refashioned Target skirt!


I am very happy with this pattern and love that I was able to squeeze it out of small pieces of fabric.  :)

Last up is a chiffon cardigan made from McCall's 6559, view B:


I was straightening up my fabric closet and discovered a bright pink chiffon saree I had purchased in India.  The color perfectly matched the bright pink in the striped ITY skirt I had just made!


Making a cardigan from the chiffon saree would give me more variations in my Travel Wardrobe, so I popped a brand new size 9 needle in my machine and off I went.  I knew that chiffon was not easy to sew, so I lowered my sewing standards so as not to drive myself nuts.  I knew that my sleeve caps would have visible gathers and I was ok with that.  I cut the pattern pieces on the cross-grain so I could use the selvage at the hem.  I added 2" of width across the bicep.  I needed about an inch of extra room and I knew that any stress would split the fabric so I made it 2" wider.


I used french seams on the shoulders, side seams, & underarms, and a narrow serged seam on the armholes.  To finish the front edges, I used a rolled hem foot and a straight stitch.  My first pass resulted in a slightly wavy seam, so I rolled it again!  The resulting double rolled hem (if that is a thing) was much straighter and firmer than the original.  The bottom hem was folded twice and stitched with a straight stitch.  The selvage was very sturdy and made this very easy.

On to the finished photos: (the color is a little odd in these photos, but it really does match!)


In hindsight, I should have made the shorter cardigan (View A) since I am short waisted.  I am wearing this up at my waistline rather than long.  I found it to look rather frumpy.  See:


Chiffon shouldn't add visual pounds.  For the purposes of the Travel Wardrobe contest, I will keep this cardigan in my 6 pack, but I may shorten it for future wear.

Here is a collage of my Travel wardrobe:


There you have it!

Related Posts Plugin for WordPress, Blogger...