Pages

Showing posts with label swimsuit. Show all posts

Tuesday, July 19, 2016

Swimwear!

I spend a lot of time during the summer at the pool, and I like to vary which suits I wear each day.  I also wear rash guards so that adds more variety to my swim wardrobe.  The 3 suits I wear the most are my 2 versions of Jalie 3023, in blue (blogged here) and red polka dots (blogged here).  I also wear this one, which is a Jalie 3023 skirted bottom and a Jalie 2563 sport bra top.  

Link
Link

Link
Link

I love tankinis and wanted to make a new one in a different style.  I wound up copying a RTW suit I had that fit well, but whose elastic was showing its age and whose straps were stretching out.  For the top front, I copied the RTW suit, and for the back I used Jalie 3023 raising up the back to eliminate the back band.  I cut the straps extra-long so that I could decide later if I wanted them to cross in the back or not. 


The bikini bottoms I copied directly from my RTW suit, and once I tried it on, it was a little blousy on the back (I’ve never had that problem before!) and I removed some of the length between the legs by taking an extra large seam at the crotch.  There is still a little bit of extra fabric but it is acceptable as is. (Sorry: no photos of the bottoms). The fabric was a printed spandex from SpandexWorld.com that I bought quite a while ago and had been saving for something special.


As I said before, I wear rash guards at the pool since I don’t want to tan/age prematurely.  My current collection of rash guards, most of which were purchased from Land’s End, are starting to wear out.  The fabric in several spots have worn thin and they need to be replaced.  I have made one rash guard for myself using Jalie 2566, (blogged here).  Searching on Pinterest for some rash guard inspiration, I noticed that most of the ones I liked had raglan sleeves.  I owned Jalie 3245, the raglan tee and tank pattern but had only made the tank.  I traced off a size V (2 sizes smaller than I would normally) and raised the neckline up to be much higher for a rash guard.  For the sleeve and back, I used the size FF neckline.  The front needed to be raised up even higher than the FF level.   I did a quick muslin and was happy with the fit.  Instead of doing Jalie’s method for the neck binding (which is quite clever) I cut a 2” wide band and folded it in half lengthwise, for a Renfrew-style neck binding.  I also made the sleeves full length. 


The fabric is a very pretty navy background with dark turquoise rose and leaves.  I purchased it from Hancock Fabrics before they closed their doors for good (sniff sniff).  I absolutely love how it turned out!


(the sleeves are all twisted because I was already wet when it put this on!) 

Thursday, May 28, 2015

A New Swimsuit


Here is a quick post showing photos of my latest swimsuit.  The skirted bottoms are Jalie 3023, and the top is  Jalie 2563 (view B).  I used a stained glass patterned spandex from SpandexWorld.com.


Here are IRL photos of me poolside in Cancun!


The only changes I made to the bottoms were to raise the waistband and to lengthen the skirt.  The top was made without changes.

Back to vacation!

Saturday, January 31, 2015

Tis' Not Quite the Season


January in the northern hemisphere isn't the normal time of year to make swimwear, but that is what I have been doing.  It started because a friend called me up to ask if I could make her daughter 2 new swimsuits since she is doing winter swimming and is in desperate need of a new suit.  I whipped up 2 new Jalie 3134 racerback suits, and since the swim elastic was out, and the stretch needle was on the machine, I figured that was my sign to work on a Jalie 3350 for me.

Jalie 3350

I made view A with the open back and sweetheart neckline.  I made a straight size Y.  I initially did a FBA on the cups, but I wound up tearing the whole thing apart when the cups were WAY too big.  To conserve fabric I re-cut the same pieces to be a straight size Y and they are fine now.  If you are small busted, you might find the cups to be very roomy.  I would have preferred the straps to be wider and firmer to give more support.   That's a change that can be easily implemented next time.


I added sew-in swim bra cups and hand sewed them in.  


It has been a while since I have worn a 1 piece swimsuit, and to be honest, I'm not sure how much I will wear this one.  There's nothing wrong with the suit itself, it's just how I feel in it.


This suit is not the only thing I have been working on.  I have made a few more versions of the Orange Lingerie Marlborough Bra.  My reason for learning how to make bras was to incorporate an underwire into a swimsuit.  I have been working on a bikini top with an underwire and a foam cup!


This is highly experimental and is very much a case of sewing by the seat of my pants, but I am learning.  I have purchased 2 book on bra making and I'm hoping to devour all of the information in them and apply it to swimwear and bra making.

 :)


Tuesday, July 8, 2014

More Red...just not for me

After celebrating an excellent Fourth of July, both of my daughters realized the wisdom in my words "Reapply sunscreen!"  My eldest had been complaining about her current rash guard being too small and didn't want to wear it.  (tsk tsk)
I had her search through my spandex stash to find something she liked which I could make into a rash guard and bikini bottoms.  She chose the red polka dots which I used for my most recent Jalie 3023:


I had only purchased 1 yard of the polka dots so there wasn't enough to make an entire rash guard from it, but I was able to make the bottoms of Jalie 2447 in size M.


The bottoms come in either a high or normal waist version.  From previous experience I knew that the high waist version is quite high...about belly-button high.  I cut the high waist anyway knowing that I could trim it down before adding the elastic.  My eldest thought that the high waist was indeed too high and I trimmed it down 1.25" before adding the elastic.   After finishing the briefs, I made a solid red rash guard for her from Jalie 2566 with a raised neckline and lengthened sleeves.   I had enough polka dot scraps to make the neck band and sleeve bands (Renfrew-style) to up the style factor.


 I topstitched the seam allowances down using a chain-stitch on my coverstitch machine.

 
So there you go...more red threads.  If this keeps up I will soon need a new huge spool of red thread!  


Thursday, June 26, 2014

Swim Shorts! Jalie 3351

I loved Jalie's new pattern releases.  The first one that made me say "Oooh!" was #3351, the swim shorts. 
 
Jalie 3351
I am pretty conservative when it comes to swimwear.  I always wear a rash guard and typically wear a swim skirt.  While living in India for 3 years conservative dressing was the norm and anything very revealing was scandalous.  I got used to people staring at me no matter what I wore, so it was just better and less stressful/annoying for me to be covered up.  Also, when we first arrived in India, my girls were 2.5 and 4.5 years old; I could not rely on them to get sunscreen on my back so a rash guard was really necessary.

I made the swim short in boring black milliskin matte from Spandex World.   I cut a size X at the waist and a Y at the hip.  I made the shorts as designed with the attached brief.  The leg opening of the brief is very modest and quite low cut.  Like all Jalie patterns I have made, the drafting is excellent.  I had only one issue with the instructions.  The final step didn't mention how to attach the brief to the shorts and waistband.  Strangely, the French version of the instructions didn't mention how to attach the shorts...I emailed Jalie and got a response the next morning:

 
Hi Meigan,
 
You attach the briefs at figure 31 (very last step, after the waistband is attached to the shorts):
Pin wrong side of shorts to waistband facing, at the seam allowance, matching centers and sides (fig. 31). Stitch, stretching the band as you sew.


There is indeed a small mistake on fig. 31 (on the label at the bottom of the shorts). It should be like this:
Thanks for pointing it out! 


Have a great day,


Emilie FournierJalie Patterns Inc.
Now, the diagram on my pattern looked just like the one she sent me, but she didn't answer my question about the assembly.  EDIT: I email again before writing this blog post and she agreed that there was a mistake in the instructions and has made a note on the website. (Side note: I still think their errata on the website is incomplete and there is a missing step in their instructions.  I have sent another email and I am awaiting a response.)

****UPDATE****7/3/2014
I just received a response from Emilie at Jalie Patterns.  She realized that they were in fact missing a step between figure 30 & fig. 31.  She has updated the .pdf instructions.  Here is the link:
http://www.jalie.com/product_printing_guide/3351.pdf
 
Rather than waiting for an answer to my original enquiry, I sewed what made sense to me.  I basted the shorts and briefs together with a zig-zag stitch.  Then I attached the waistband to them both.  Ta Da!
 
Front view (photo is lightened so you can see the black)

Pocket!
 
I made the rash guard last summer.  I made it using the Jalie 2566 tee shirt pattern.  I cut at least one size smaller than I would have for a tee shirt, and raised the neckline, added a neck band and lengthened the sleeve.   It was an easy tweak to change the pattern from a tee to a rash guard. 
 
I wore the shorts swimming before writing up this post, because I wanted to give a complete and thorough review. 
 
First of all: elastic that is comfortable when you are in your sewing room and dry is a little too loose when swimming.  I did not follow Jalie's elastic lengths and measured what was comfortable on my waist instead.  Well...it's a little loose.  Not falling off in the water loose, but "I'd be happier if it were a little more snug."
Second, the shorts stayed soaking wet for a very long time. There is a lot of fabric that holds a lot of water.  Granted, my fabric is not super thin, so it's likely to be wetter and heavier than a thinner fabric, but I was noticeably wetter longer than normal when wearing a swim skirt.  For my next iterations, I may do something fancy and omit the pockets, and also use thinner spandex but for the sake of sharing knowledge, it's something to consider. 
 
Here are some more photos:
Side view

And because we are all friends, here is what I meant about the briefs being very modest and low cut around the legs:


So in summary, they look great, they feel good.  The length of the shorts was very good.  The instructions are missing a tiny bit of info, and consider the weight of the fabric when wet.  I will get some good wear out of these swim shorts and will make more pairs in the future.  Another winner from Jalie.


Monday, June 9, 2014

A Polka-Dot Tankini: Jalie 3023

It's summertime so I am sewing swimsuits again!  I have made another Jalie 3023 Tankini.

Jalie 3023
My first one was made last March and I still love and wear it all the time:


First Version: Blogged Here
 I got the idea into my head that I really really wanted a red polka dot swimsuit, and so this one was born:


Ta Da!  I made only tiny changes on this version.  First, I raised the waistband of the bottoms by 1/2".  Second, I lengthened the skirt by 1"; I think the skirt hits my hips/thighs in a better spot now.  Third:  I added powermesh to the front waistband.  It now acts like a little tummy smoother which is awesome!
 
Once again I'm glad I made the little tutorial about the strap assembly and construction.  I referred back to it before I started sewing and it was a good refresher which sped up my sewing considerably. 
 
For this version, I used white for the waistband just for some fun contrast.  :) 
 

Bring on Summer!


Thursday, June 13, 2013

Just Keep Swimming...

School is out.  Summer vacation is here.  I've been going to the pool in the mornings for my girls' swim team practice.  Since I'm already there, I might as well swim laps right?  And I might as well wear one of my new Jalie 3134.
Jalie 3134

 How about a Purple one?  Or a Blue one?  

I made the purple one first and gave it a test swim and then made the blue one a week later.

Let's do a breakdown of this pattern.  The front is designed with 5 (yes 5 pieces).  1 Center front.  2 inset pieces possibly done in a contrasting fabric, and 2 side fronts at the hip.  I originally wanted to cut the front in one piece like I had done for my daughters.   Ummm...not happening.  Curvy moms need curvy suits.  The front pieces provide the necessary shaping at the bust so I couldn't merge the pieces into one.  What I could do was merge the inset with the side front piece so that the front of the suit had 3 pieces rather than 5.  Much simpler.  The center front and side front pieces are individually lined prior to assembly, so there is a visible seam on the inside, not hidden by any lining.

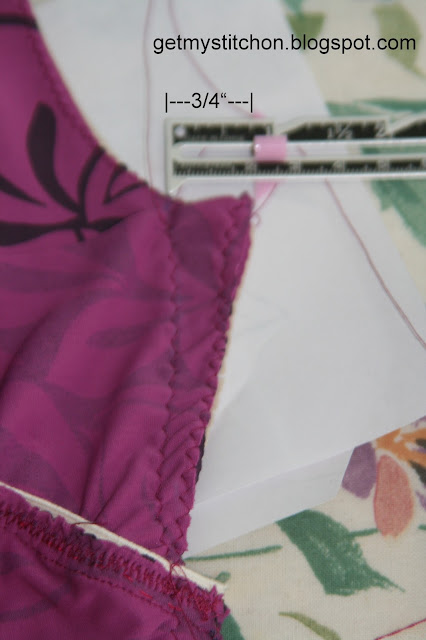
Speaking of curves, normally I add bra cups to my suits.  I had some inspiration from the Funky Seamstress when she did the same with this pattern.  But since I wanted my front pieces to be interlined like the pattern instructs, how could I add the bra cups after the suit was assembled so that I could position them correctly?  What to do....what to do....Ding Ding!  I decided to add an additional layer of lining to which I could attach my bra cups and also add a band of 3/4" elastic at the bottom like a shelf bra.  I waited until I had assembled the entire front then traced the front bodice onto tracing paper.  While tracing I stretched out the bust area so that I could get a more accurate width.  Just like the Funky Seamstress, I wanted the elastic band under the bust to line up with the elastic on the back band.  I fiddled a bit until everything lined up.  I used a zig-zag stitch to sew the bra cups to the extra lining placing the cups between the 2 lining layers.  So my swimsuit front pieces were interlined and I was able to have a bra cups.  Win-win!  This is what it looked like prior to sewing this layer in.
 
I basted this lining/bra piece to the swimsuit front using a zig-zag stitch prior to serging the side seams and then constructed the rest of the suit like normal.   When making the blue suit, I omitted the bra cups because it made the suit grab a little bit too much water when I was swimming laps.  I didn't really need a drag suit.  :)  I also made the back band slightly (about one size) narrower to pull the chest in tighter.   

One change I made to the pattern was thanks to a comment I received on patternreview.com.  She asked if I had lowered the leg opening on my daughters' suits...no I didn't alter theirs, but looking at the envelope photo I NEEDED to lower it on my suit!  Thank you, Thank you! thank you KD in ATL for asking!  I lowered the leg opening by 1" and it was just right.  Not too high and not grandma-esque.  Just right!  Check it out from the side view:

Now I can't be selfish and only make myself new suits can I?  Nope.  I did an assembly line and made 4 suits at a time (3 for us and one for a friend's daughter--my first commission!!)  Here are my girls' new suits:


All fabric was from Spandex World.  My eldest wanted the colorblocked suit and I sent away for swatches from order to choose which blue (cobalt or navy) would look best with the print I had chosen.  I'm glad I did order swatches, colors do look different on your computer monitor.  One note about using all 5 pieces of the suit front:  it creates 2 seams that hit along the front of the thigh, and when attaching the elastic they are folded under and it makes a bit of a bump along the seam.  The smaller the suit, the closer together the seams become.  When my eldest first put the finished suit on, she complained about it.  Thankfully she hasn't mentioned it since, so it can't be too bad.  In any case, I thought it worth mentioning. 

We all love our new suits.  I have now made this pattern 7 times.  I think that is a record for me!!


Sunday, June 2, 2013

Me Made May 2013: The Finale

I made it!

I, Meigan of Get My Stitch On sign up as a participant of Me-Made-May '13. I endeavor to wear at least one item of handmade clothing 5 days of the week for the duration of May 2013'

I only took 2 days off the entire month!  Yay me!

Last week I did up the ante and pledge to wear a skirt at least one of the 3 remaining days, and to prove my commitment, I wore one twice instead!

Here is what I wore on the final days:

Day 29: unfortunately no photo from that day but I wore my Kwik Sew 3341 skirt, (which I also wore on day 19 as seen here) but this time I wore a red RTW tee shirt.

Days 30-31:


Day 30: Another Skirt!  McCall's 6654 which is possibly the simplest thing I have ever made.  It is an A-line knit skirt with an elastic waistband.  I made the entire thing on my serger (my regular machine was in for repairs) and I finished the hem with a lettuce edge hem.  It's one of those patterns that I had trouble believing I actually spent money on it is so simple.  Look a the line drawings:


I made view G in a size 18.  So stinkin' easy!

Day 31 is a 2 part-er:  I wore my purple burnout renfrew (again), and went to the beach in the afternoon where I wore my second Jalie 3023 bathing suit.  I do wish I had cut the skirt longer, but I was too quick with the rotary cutter.  Oh well...

So that's it!  Me Made May Mission Accomplished!

Sunday, May 26, 2013

Memorial Day Weekend = Summer = Swimsuits!

I've done it again!  Swimsuits!  Woo Hoo!!  This time it was racing style suits for my daughters.  I used Jalie 3134:
Jalie 3134
Here are the final versions:


and from the back:
Back view.  Note: I omitted the CB seam on the blue suit
I simplified the pattern by not using contrast fabric and not even cutting out the pieces for the contrast.  I traced the pattern pieces onto tracing paper, then overlapped them 1/4" (to eliminate the seam allowances) taped them together and cut out the front fabric and lining in one piece.  See:

Let me do a tiny bit of complaining here.  Most girls under ~10 years old or so are basically rectangles.  No chest, no waist, and only a small increase in size at the hip.  The girls' size ranges on the pattern assume a waist smaller than the chest and a hip slightly larger than the chest.  That's not a rectangle.  According to their measurements both girls (both rectangles) crossed more than one pattern size.  This was especially true for my eldest.  Let's see what I did in order to cut a pattern to fit her.

Chest: size J (25")
Waist: size N
Hip: size J/K
Torso Length (Girth): size L

I cut a size J at the chest, graded out (ie made a straight line like the side of a rectangle) to an N at the waist, and back in (aka a straight line) to a J/K at the hip.  Because she has a long torso, I lengthened the straps and the distance between the underarm and hip to correspond to a size L.  Confused?  Yes, it was an exercise to keep track of my length and width changes.  

Trace the pattern pieces and laying them out first was a great idea.  I will do this each time I trace a new size.  By doing that, I was able to make sure that my pieces would fit together and give me a chance to make sure that I had lengthened and widened where necessary before cutting the fabric.

Cutting a pattern for my youngest was easier.  She was almost a perfect size H (chest = 23") except for the torso length where she was a size J.  So I only had to worry about lengthening the straps and torso (both front and back) to be a size J length while keeping the size H width.  

As with all Jalie patterns I have made, the instructions are excellent.  There is a center back seam on the suit which I omitted when making the blue suit.  I didn't see the need to have it and my youngest is notoriously fussy about seams/tags/etc being uncomfortable (whine whine whine) so I cut the back on the fold (while remembering (yay!) to omit the seam allowance).

The assembly of the suit was very straight forward.  I basted the side seams with a zig-zag stitch and had each girl try it on before serging.  In both cases, I needed to take in the sides starting from the back band up to the underarm:

Taking in the side seams at the back band up to the underarm

Once the suit was snug, I serged the side seams.  There is actually very little serging that can be done on this suit.  I only used mine on the crotch and side seams, and on attaching the elastic to the bottom of the back band.  All other elastic was sewn on with a zig-zag stitch then turned to the inside and top-sitched with a twin stretch needle.  So there's no obligation to have a serger!

All 3 of us are THRILLED with these suits.  They can't wait to wear them swimming, and I am thrilled that they came out so well and are so cheap to make!!  They swim on a local swim team and I literally spent $68 per suit (gulp) for their swim team suits.  To make both of these cost me about $25 total.  AND I have lots of fabric left over and I can use the pattern again and again.  

I only had one minor panic as I was finishing the blue suit.  I was coming close to the end of my spool of turquoise thread and was desperate to finish before it ran out...so naturally...I started sewing faster! (so silly)  Thankfully, I finished the last stitches and had this left:
PHEW!

So in conclusion: Sew it.  Love it. Swim in it!

Oh--in other news:  In case you didn't know, Katie who blogs at http://katiekadiddlehopper.blogspot.com and Leila of Three Dresses Project are having a Summer Swimalong!  Check it out:

Related Posts Plugin for WordPress, Blogger...